Frequent search terms

- COMPO
- Guide
- Inspiration
- DIY
- Lantern with dried flowers
Making a lantern with dried flowers
Summer lights for gloomy days
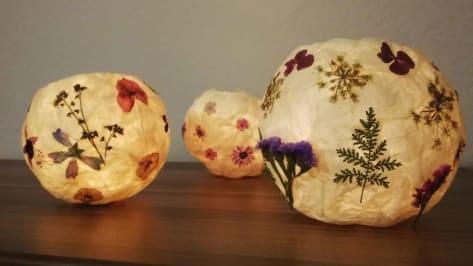
Warm light and colourful flowers for cold winter evenings? A few gems collected from the garden and some glue is all it takes. This article gives you step by step instructions on how to make magical lanterns from dried flowers and tracing paper. And if you don't have your own garden to collect things from, no problem! Grasses, leaves and simple meadow flowers from the park look equally as beautiful.
Table of content

Things you need
- Flowers, grasses or leaves
- Newspaper
- Heavy books for pressing
- Tracing or mould-made paper
- Glue
- Brushes
- Balloons
- Glitter is of course also allowed
- Some string for drying
Collecting and pressing the flowers
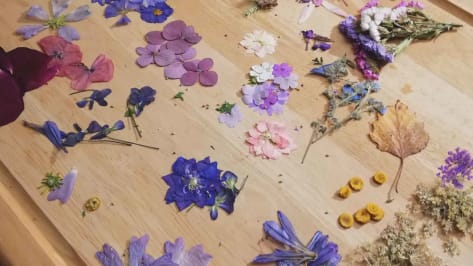
Before you can start making the lanterns, you have to obtain and prepare the material. When choosing your favourite flowers, you should bear in mind that they will have to dry between newspaper and books later on. This means that especially large and fleshy flowers are rather unsuitable – they start to rot quickly between the books and are not very translucent on the lantern later on. Accordingly, if you'd like a hibiscus or rose, rather than using the whole flower it's best to pluck off individual petals. Satisfied with what you've collected? If so, let's start drying! To do this, carefully place the collected material between a few layers of newspaper and leave to dry for about a week under a stack of books. To avoid rotting, it may be necessary to replace the newspaper after about three days.
Making the lanterns
In the meantime, you can start to prepare the lanterns. You can decide how big they will be when you blow up the balloons – but they need to be big enough for the tea light to burn inside them safely.
Tip
Tie your balloons tightly because the lanterns will shrink if they lose air when the papier-mâché dries!
Now's the time to make the lanterns. Simply tear the tracing paper into small snippets – just go wild, they don't have to follow any particular pattern at all. Once a small mountain of snippets has accumulated, things get sticky! Brush the balloons with an evenly applied first layer of paste and then cover them with snippets of paper. Once you've pasted three or four layers together, allow to dry for a few days. But where can you put the sticky balloons? This is where the piece of string comes in. Tie it to the neck of the balloons and hang them on a clothesline. Once the papier-mâché has hardened, separate it from the balloon. Cut a circular opening around the balloon's neck and carefully peel it out of the ball.
Decorating the lanterns
Now we get creative! Flowers, grasses and leaves are placed around the lanterns as desired and fixed with paste. Unfortunately, the colourful flowers tend to fade quickly when they are saturated with paste. To keep them as dry as possible when you affix them, simply put another snippet of paper on top and brush that with paste. If you want to, you can finish off by sprinkling some glitter on the paste when it's still moist.
More floral variety
